Last Updated on 6 April 2024
Decorating baby shower cookies at home is a delightful way to add a touch of sweetness to any baby shower celebration. These beautifully decorated treats, also known as baby cookie favors, not only serve as a delicious dessert but also double as adorable party favors or gifts for the guests. Whether you’re hosting a baby shower or want to surprise an expecting friend or family member, learning how to decorate baby shower cookies at home is a skill that will impress everyone. In this step-by-step guide, we will walk you through creating stunning baby shower cookies that will make a lasting impression.
- Decorating Baby Shower Cookies: A Step-by-Step Guide
- Choosing the Right Cookie Cutter Shapes
- Preparing Your Cookie Dough for Baking
- Baking Tips for Perfect Baby Shower Cookies
- Cooling and Prepping Cookies for Decoration
- Selecting Colors and Themes for Baby Shower Cookies
- Mixing Royal Icing: Consistencies and Colors
- Outlining and Flooding Techniques for a Professional Finish
- Adding Details and Personal Touches
- Drying and Storing Decorated Cookies
- Frequently Asked Questions
Decorating Baby Shower Cookies: A Step-by-Step Guide
Decorating baby shower cookies is a fun and creative activity that allows you to showcase your baking skills and add a personal touch to the celebration. Before diving into the decorating process, having a solid foundation is essential. Start by preparing a batch of your favorite sugar cookie recipe. Once you have your cookies baked and cooled, it’s time to turn them into adorable works of art that will wow your guests. Let’s get started!
Choosing the Right Cookie Cutter Shapes
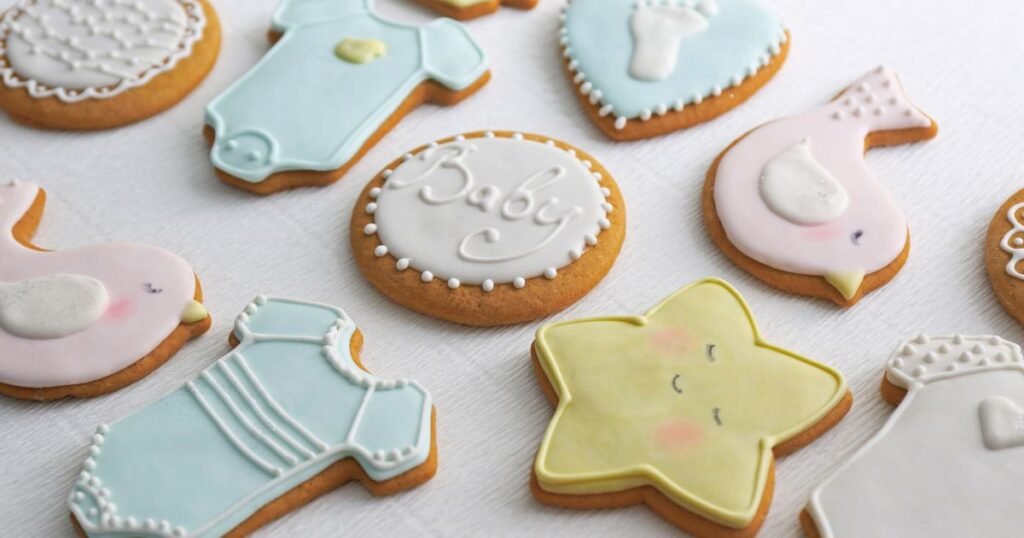
When decorating baby shower cookies, choosing the right cookie-cutter shapes is vital. The shape of your cookies sets the stage for the overall design and theme. For a baby shower, popular shapes include baby bottles, pacifiers, onesies, rattles, and baby carriages. You can get creative and opt for shapes like baby animals or baby-themed objects. The onesie is one of the most iconic shapes for a baby shower cookie. This shape allows endless design possibilities, from simple and elegant to fun and whimsical. Consider the baby shower’s theme and the parents-to-be’s preferences when selecting your cookie-cutter shapes.
Preparing Your Cookie Dough for Baking
Before decorating your baby shower cookies, you need to prepare the cookie dough for baking. Begin by gathering all the necessary ingredients for your favorite sugar cookie recipe. Most sugar cookie recipes call for basic ingredients like flour, sugar, butter, eggs, vanilla extract, baking powder, baking soda, and a pinch of salt. Follow the recipe instructions carefully, ensuring you mix the dough thoroughly and refrigerate it for the recommended time. Chilling the dough helps it hold its shape and prevents it from spreading during baking.
Once the dough is chilled and ready, preheat your oven to the specified temperature and line the baking sheets with parchment paper. Roll out the dough to the desired thickness and use your chosen cookie cutter shapes to cut out the cookies. Place them on the prepared baking sheets, leaving enough space between each cookie for spreading. Bake according to the recipe instructions, keeping a close eye on them to ensure they don’t overbake. Once baked, allow the cookies to cool completely before decorating.
Baking Tips for Perfect Baby Shower Cookies
Baking the perfect baby shower cookies requires a few tips and tricks to ensure the best results. Here are some key baking tips to keep in mind:
- Line your baking sheets with a silicone baking mat or parchment paper. This will prevent the cookies from sticking and make cleanup easier.
- Don’t overcrowd the baking sheets. Leave enough space between the cookies for them to spread during baking.
- Rotate the baking sheets halfway through the baking time to ensure even browning.
- Keep an eye on the cookies as they bake. They can go from golden to burned quickly, so monitoring them closely is essential.
- Allow the cookies to cool completely before transferring them to a wire rack. This will help them firm up and prevent them from breaking.
By following these baking tips, you’ll be on your way to creating delicious and perfectly baked baby shower cookies.
Cooling and Prepping Cookies for Decoration
Once the baby shower cookies are baked to perfection, it’s essential to let them cool completely before proceeding with decoration. This allows the cookies to firm up and ensures they won’t break or crumble during decorating. Transfer the cookies to a wire rack and let them cool for at least 30 minutes. If you’re short on time, place them in the refrigerator for a few minutes to speed up the cooling process.

While the cookies are cooling, gather all the necessary tools and supplies for decorating, such as royal icing, food coloring, piping bags, and decorating tips. Once the cookies are thoroughly cooled, you can prepare them for decoration. If you plan to use various colors on each cookie, it’s a good idea to separate the cookies into different sets based on their design. This will make the decorating process more efficient and organized.
Selecting Colors and Themes for Baby Shower Cookies
Selecting the right colors and themes for baby shower cookies is important for creating a cohesive and visually appealing display. Here are some tips for choosing colors and themes for your baby shower cookies:
- Consider the gender of the baby. You might choose soft pastel colors like light pink or lavender if it’s a girl. For a boy, light blue or mint green shades can work well.
- Match the cookies to the overall theme of the baby shower. Incorporate elements into the cookie designs if the shower has a specific theme, such as a safari or princess theme.
- Use popular color palettes for baby showers, such as neutral tones like cream, beige, and gold.
- Experiment with different color combinations and themes to create unique and eye-catching cookies.
By choosing the right colors and themes, you can create baby shower cookies that not only taste delicious but also look beautiful.
Mixing Royal Icing: Consistencies and Colors
Royal icing is a popular choice for decorating baby shower cookies because it dries to a smooth and hard finish, making it perfect for intricate designs. To achieve the desired consistency and colors for your royal icing, follow these steps:
- Start by preparing a batch of royal icing according to your favorite recipe.
- Divide the icing into separate bowls depending on how many colors you want to use.
- You’ll need a thicker consistency for outlining and detailing. Add a small amount of water to the icing and mix until it reaches a stiff but pipeable consistency. It should hold its shape when piped but it should still be easy to squeeze out of a piping bag.
- You’ll need a thinner consistency for flooding or filling in larger areas. Add more water to the icing and mix until it becomes smooth and easily spreadable.
- To achieve different colors, use gel food coloring and add small amounts at a time until you reach the desired shade. Remember, a little goes a long way, so start with a small amount and add more as needed.
By mastering the art of mixing royal icing, you’ll be able to create a wide range of colors and consistencies for your baby shower cookies.
Outlining and Flooding Techniques for a Professional Finish
Outlining and flooding are two techniques used in royal icing cookie decorating that create a professional and polished finish. Here’s a step-by-step guide on how to achieve these techniques:

- Start by outlining the cookie with thick royal icing. Use a piping bag fitted with a small round tip to pipe along the edges of the cookie, creating a border.
- Once the outline is complete, let it dry for about 10–15 minutes to prevent bleeding.
- Fill in the outlined area with a thinner consistency royal icing. Use a spoon or squeeze bottle to flood the area with icing, spreading it evenly within the border.
- Use a toothpick or scribe tool to spread the icing and remove any air bubbles.
- Allow the flooded icing to dry completely before adding any additional decorations or details.
By mastering the outlining and flooding techniques, you’ll be able to achieve a professional and polished look for your baby shower cookies.
Adding Details and Personal Touches
Adding details and personal touches to your baby shower cookies is what takes them from basic to extraordinary. Here are some ideas for adding those special touches:
- Use edible markers or food-safe paintbrushes to add small details like eyes, mouths, or patterns.
- Decorate with edible pearls, sprinkles, or edible glitter for a touch of sparkle.
- Add texture by using different piping tips to create designs like ruffles, dots, or stripes.
- Incorporate edible images or edible wafer paper to showcase specific designs or themes.
- Get inspired by browsing websites like Pinterest or Instagram for creative cookie-decorating ideas.
By adding these personal touches, you’ll create baby shower cookies that are uniquely yours and sure to impress your guests.
Drying and Storing Decorated Cookies
After you have put in all the effort to decorate your baby shower cookies, it’s important to let them dry and store them properly to maintain their freshness and appearance. Follow these tips for drying and storing decorated cookies:
- Allow the decorated cookies to dry completely at room temperature. This can take anywhere from 6 to 24 hours, depending on the thickness and intricacy of the decorations.
- Once dry, store the cookies in an airtight container to keep them fresh. Layer the cookies with parchment or wax paper to prevent sticking or smudging.
- If you plan to ship the cookies, place them in a sturdy box with packing material to ensure they arrive in perfect condition. Consider using bubble wrap or foam peanuts to protect the cookies during transit.
- Remember to label the container or box with the date the cookies were made to keep track of their freshness.
By following these drying and storing tips, your decorated baby shower cookies will stay fresh and ready to enjoy.

If you’re looking to create beautifully decorated baby shower cookies at home, this step-by-step guide has got you covered. From choosing the right cookie cutter shapes to adding personal touches, your cookies will surely stand out. Get creative with colors and themes, master the art of royal icing, and learn how to store your creations perfectly. These cookies make a delightful treat for any baby shower celebration! So, roll up your sleeves, let your imagination run wild, and impress your guests with these adorable and delicious homemade cookies. Enjoy the process, and have fun baking!


